Skip to Content
ManualLogScanner › Getting started

Getting started

What LogScanner does, what you need, and how to get from the App Store to your first scan.

What LogScanner does

LogScanner measures logs using the LiDAR scanner and camera built into recent iPhones and iPads. Walking around a log and capturing each end face produces:

Output
Length, big-end diameter, small-end diameter, average diameter, sweep, and taper.
A board-foot or cubic-volume estimate under a chosen log scale — Doyle, Scribner, International ¼", JAS, Smalian, and several others.
A 3D mesh model, a top-down isometric view, and 2D cross-sections along the length.
A PDF and CSV project report covering every log scanned in the current project folder.

Scanning runs entirely on the device. No internet connection is required.

What you need

A LiDAR sensor is required to scan. Present on the iPhone 12 Pro and Pro Max and later Pro models, and on iPad Pro models from 2020 onward. On a device without LiDAR, LogScanner still opens — the two scanning buttons are unavailable, and the scan library and Settings remain fully usable.

Also needed: iOS 17 or later; daylight or strong indoor lighting — LiDAR works in the dark, but the colour camera does not, and end-face boundary detection relies on it; and a short walk around the log, near enough to see both ends and reach each one with the device in hand.

Installing and first launch

LogScanner is available exclusively from the App Store. Search for "LogScanner" (Bunyan Software) and install in the usual way.

The first launch shows two things in sequence. First, permission prompts: camera access when you start a scan, and photo-library access only if you choose Save Image from the share sheet. LogScanner does not request location, microphone, motion, contacts, tracking, or notifications. Second, a ten-step onboarding walkthrough showing the recommended scanning sequence. Skip (top right) jumps straight to the Home screen; it can be replayed at any time from Settings → Help → Show Tutorial.
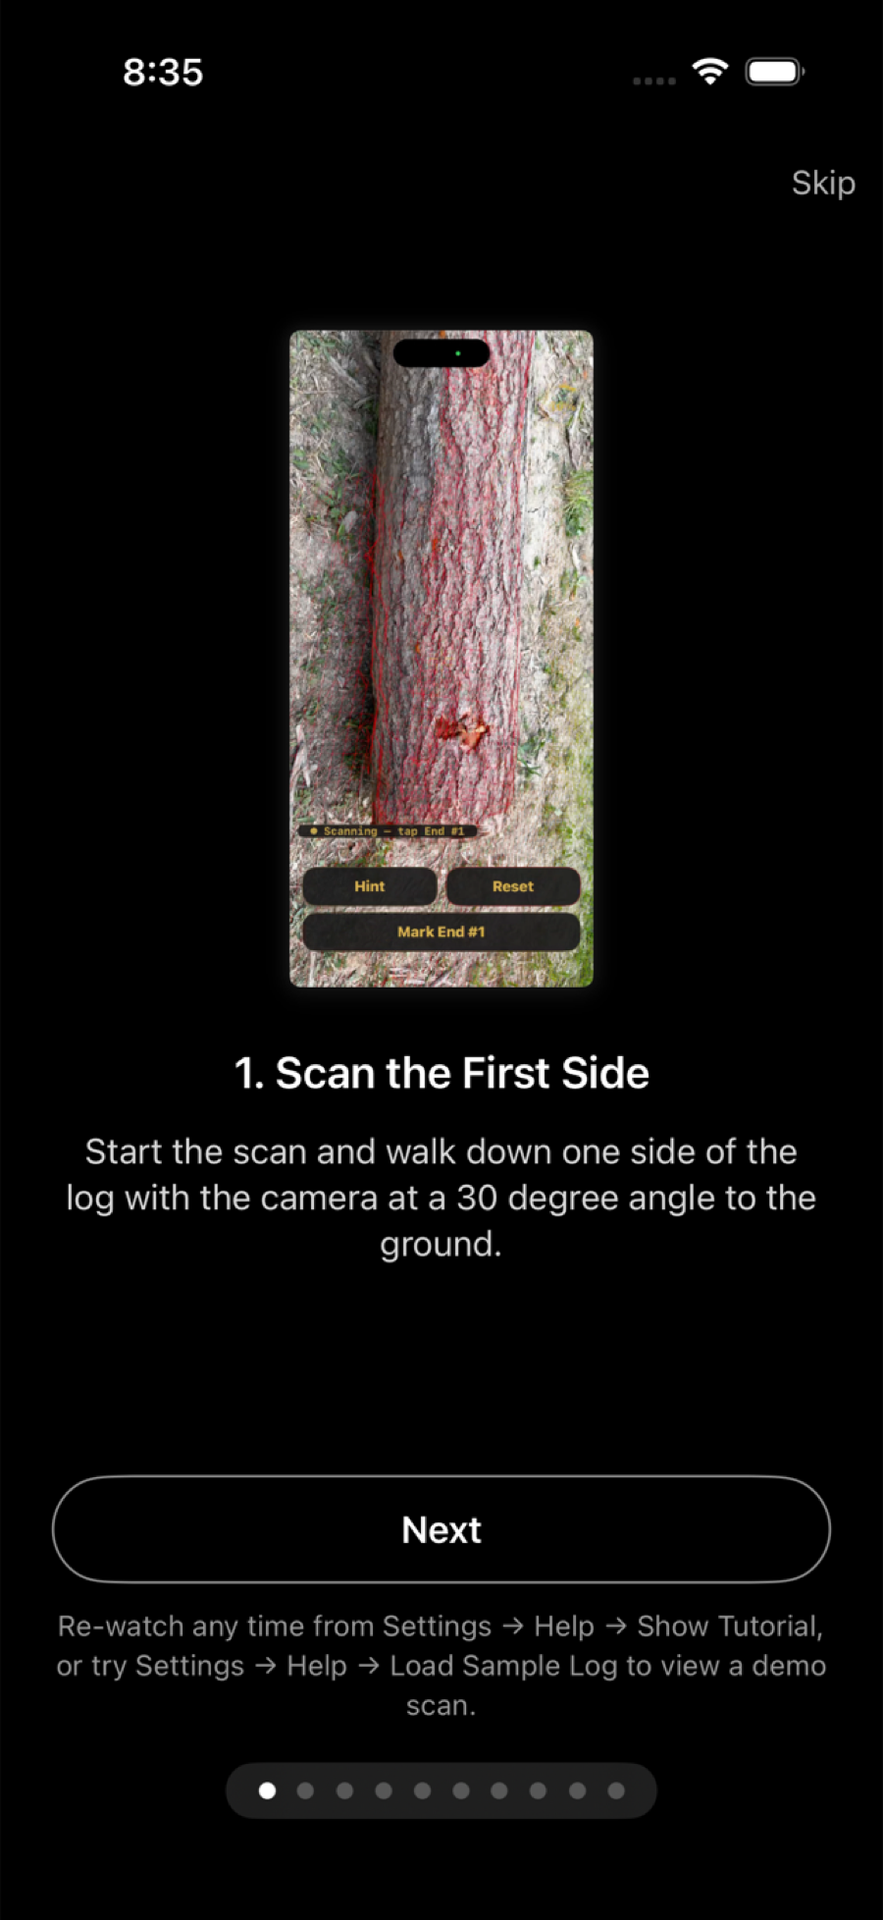
Onboarding step 1 of 10
Onboarding, step 1 of 10.

Home screen tour

After onboarding (or Skip), the Home screen shows four primary buttons and a Settings gear.
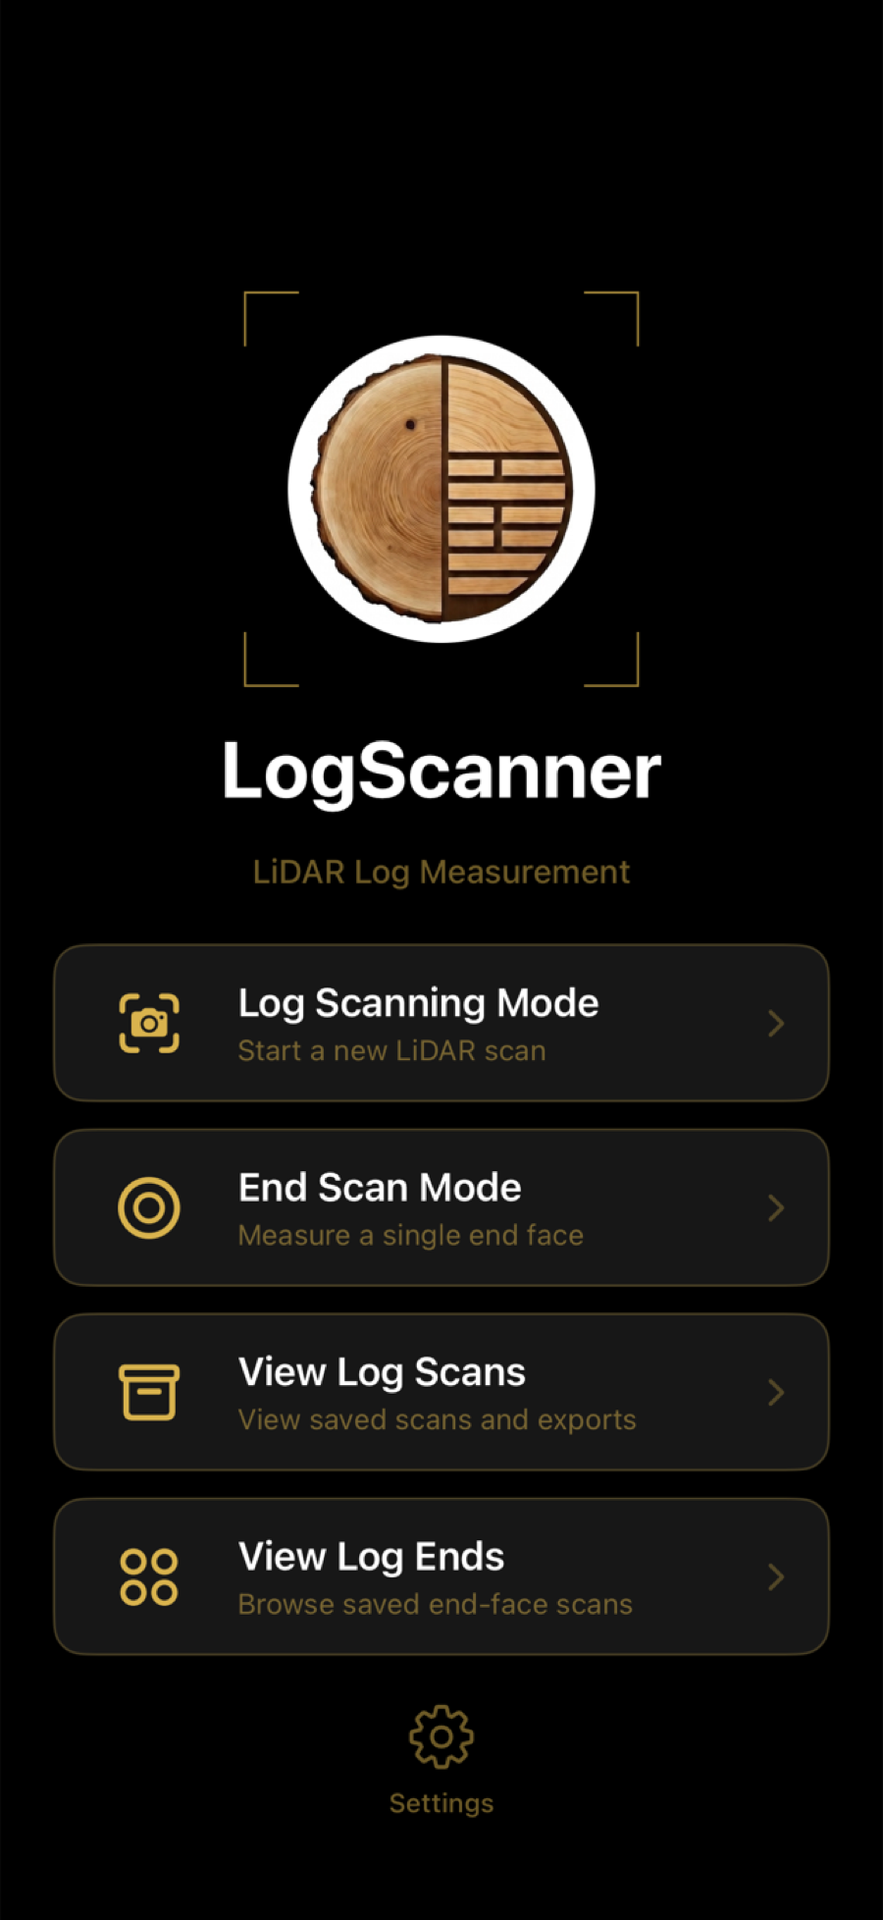
The Home screen, with each button numbered
1
2
3
4
5
Home screen
1
Log Scanning Mode
Capture a full log: both end faces plus the barrel. The main flow — covered on the next page.
2
End Scan Mode
Capture a single end face. Faster than a full scan; used for yield estimation and end-grade work.
3
View Log Scans
Opens the library of saved full-log scans.
4
View Log Ends
Opens the library of saved single-end scans.
5
Settings
Units, log scale, project folder, subscription, and the tutorial replay.
A free-preview banner appears above the buttons until you subscribe. It runs a complete scan from start to finish so you can confirm LogScanner works on your device; measurements, saving, and exports activate once you subscribe.